Configuring a Remote Development Environment
Open “Visual Studio Code”
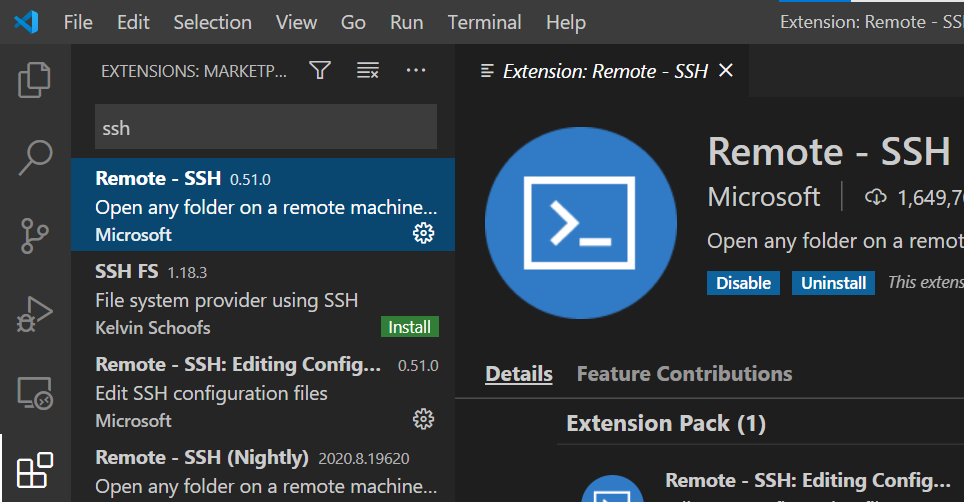
Click on the “Extensions” button on the left (Looks like a set of blocks)
Search for and Install the “Remote - SSH” extension
Click on the bottom-left of the window (a
><icon)Click “Connect to Host… Remote SSH”
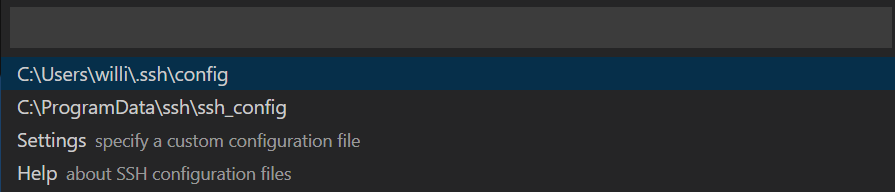
Click on “Configure SSH Hosts…”
Choose the first listed file (where it lists a
.ssh/configfile in your account directory)
- Change the contents of this file to be of this form:
Host linuxlab
    Hostname csciarch<##>.millersville.edu
    User     <your millersville login name>
NOTE: the <angled brackets> are just placeholders.
Remove them from the file and fill in the appropriate information. For
## in the hostname, choose ‘02’, ‘03’, ‘04’, or ‘05’. Try to choose
wisely/randomly since if everyone is using the same machine, things will
get slow! For your username, do NOT include the “@millersville.edu” part. For
example, John Doe’s file might look like this:
Host linuxlab
    HostName csciarch04.millersville.edu
    User     jtdoe
Save the file
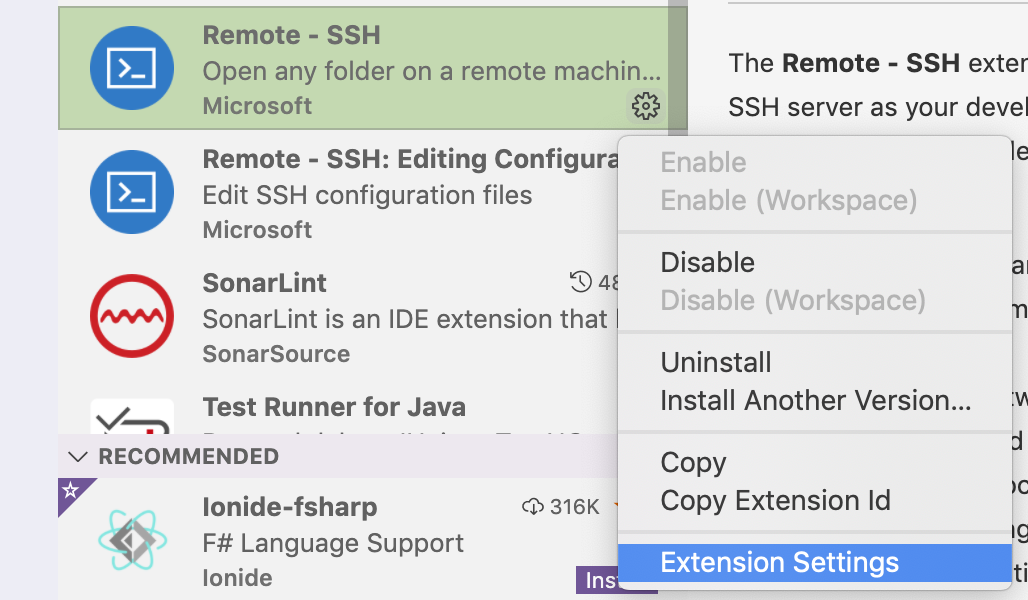
Click on the “Extensions” button on the left again (looks like a set of blocks) and select the “Remote - SSH” extension
Click on the settings for the “Remote - SSH” extension (looks like a gear) and select “Extension Settings”
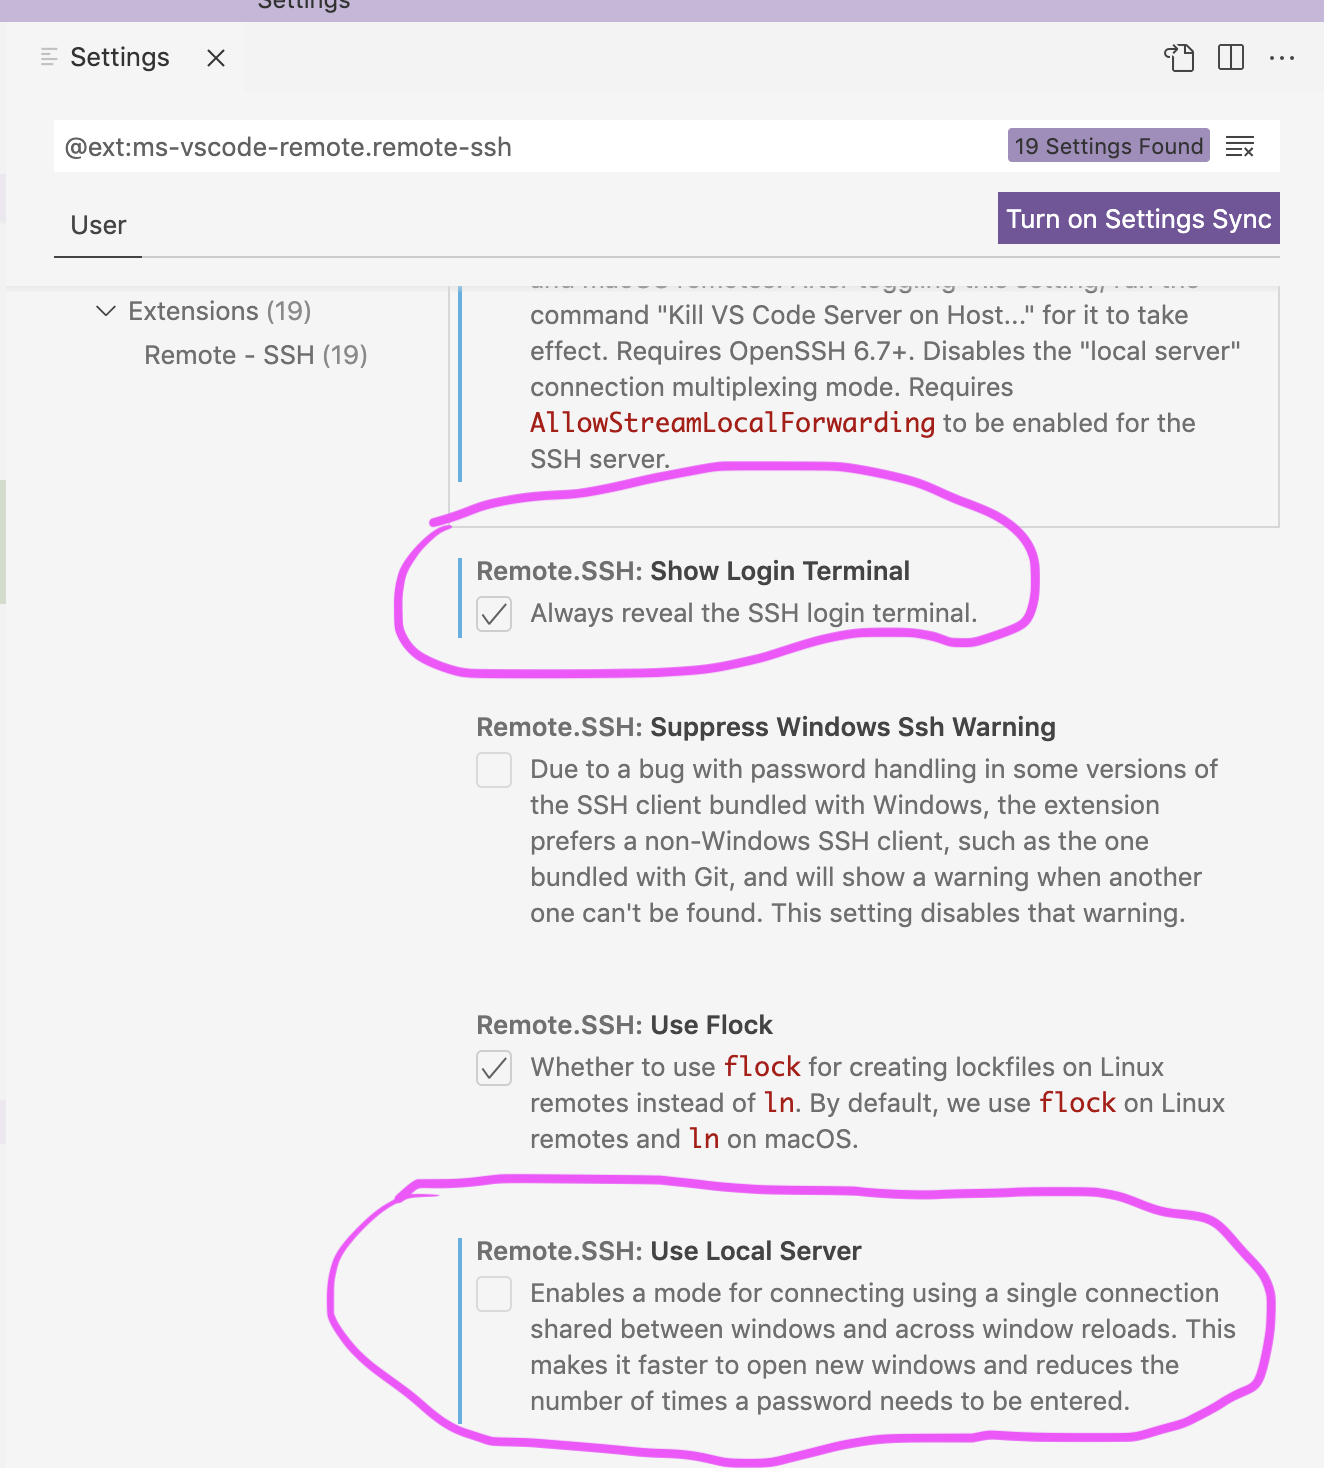
In the Settings tab of the right-hand pane of VS Code, scroll to the bottom of the settings. Click the box for “Remote SSH: Show Login Terminal” so that the box is checked
In the Settings tab of the right-hand pane of VS Code, clear the box for “Remote SSH: Use Local Server” so that the box is clear
Note: You can also edit this in the .json file by selecting the ’Open Settings (JSON) icon at the top of the window. You would want to add the following:
 "remote.SSH.showLoginTerminal": true,
 "remote.SSH.useLocalServer": false
Click on the bottom-left of the window again and choose “Connect to Host… Remote-SSH”
Choose “linuxlab”
If a popup for Windows Firewall or any Anti-Virus Software appears, ensure that you allow connections on Public and Private networks
If prompted, choose “Linux” as the remote Operating System
If prompted, click “Continue”
Enter your Millersville account password
Choose your Duo option and respond on your device
In the new Visual Studio Code window, Click “Terminal > New Terminal” – you should see a new window with your Linux shell prompt displayed in the terminal. Here you’ll be able to access your remote files and run commands on the remote Linux machine.